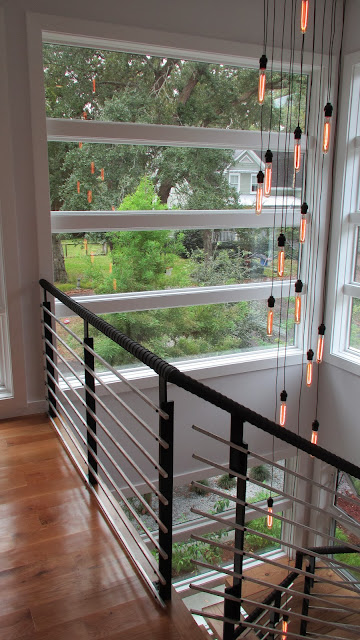
One of the curious parts about building our house was the sentimental ideas from our past that got designed into the house and ultimately the choices we made. That's why we have a vegetable garden. A theater with a turntable. A really functional kitchen. These are things we either grew up with or are very fond of. That said, about 15 years ago I started a leather upholstery company. I am basically out of the business nowadays, but there is still a real attachment for me when it comes to leather and handcrafted leather pieces. The stair railings were a perfect opportunity for me to do something handmade and custom on the house.
The leather business basically paid the cash down payment on the house I owned in Seattle. The proceeds from that house paid for the land this house is built on. So indirectly it's true... this is the house that leather built!!
I got the idea from Spinneybeck, the leather supplier Andy and I use. They make custom leather handrails. They are gorgeous but also phenomenally expensive! Here is how I replicated their idea.
I bought two hides (2 full cows) of very dark brown full grain Spinneybeck leather from ebay. At retail value of about $12 per square foot, 105 feet of leather is worth $1260. Crazy expensive, but these are some of the nicest hides on the planet... they come from Italy from farms that do not have any barbed wire fences. There are almost no scars or imperfections on the hides. Anyway, the ebay price was only about $250 for 2 hides. Some upholsterer had 2 overstocked hides and I bought them.
Using superior quality leather is the only way to go. It never fades, flakes, or does anything you don't want it to. The stretch is consistent all over the hide. You don't have to worry about cutting out any flaws or marks either.
I started with the first railing removed, and put it on my workbench. I made end caps and sewed them onto the railing with a half baseball stitch:
Then I cut long strips from the hides... as long as possible. I used my yardstick for the width of each strip. And I folded over 1/2" of material and glue it down.
Then I started wrapping one piece at a time. The half inch fold creates a rib that feels really nice when you grab the railing. I didn't measure the spiral (although I thought about making a tool), I just eyeballed it and took my time.
The first rail took a whole day of work:
After installation, I replaced the aluminum square bar horizontal rails and here was a finished product:
Now I just needed to do that same work for about 3 times more railing, and for a railing that had 3 severe corners. And, the main railing is all one piece so I had to do the work in-place instead of on top of my workbench.
More strips. Lots and lots of strips.
The finished product, with all the aluminum square bar back in place:
It took me two very full days of doing nothing else to get to this point. I am a little curious what it would cost to hire someone to do the same work. The hand rails feel great and I think they will encourage people to touch them and use them, which is the whole point!
Some of the corner details:
This Eames Lounge chair, by the way, actually belonged to my parents. They bought it new circa 1970. At one point, Andy and I had pretty much trashed it so they recovered it in nougahide. A few years ago, between Andy, Rachel, and myself, we recovered it completely. It has Spinneybeck distressed leather, which is nice because it hides cat claw marks!!
This took almost one entire hide. I have one more hide, and a bunch more railing that goes from the second floor up onto the third floor. I will take a few days off from leather before I start that job!!


